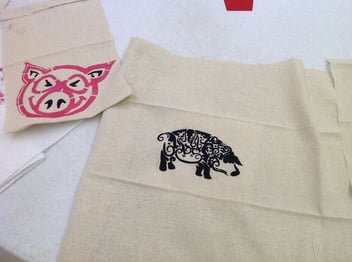
 Have you ever had a great idea for a T-shirt or quilt and wished you could make it yourself? It could be just that simple. In fact, doing it yourself could be as easy as gathering up and using a few items you may already have around your house.
It’s truly as easy as 1-2-3, it’s very affordable, and all it takes is some paint (or bleach), a few common tools, and freezer paper.
Step One: Put your design on freezer paper
There are two basic ways to go about this first step. You can either:
- Use the freezer paper as a stencil (where the design is cut out of the paper and the paper shields the fabric from the paint.)
- Or, use the freezer paper as a shield (where the paper is cut out in the shape of the design and is the only spot that retains the color of the shirt.)
You can choose which to use based on the finished product you have in mind.
If you choose option #1, you’ll want to draw (or trace) your design onto the non-coated side of the freezer paper, then use sharp scissors or razor blade to precisely cut out every portion of the design that you’re going to want to paint on the final product.
If you choose option #2, you’ll start by drawing or tracing the shape or design onto the non-coated side of the freezer paper, and then just cut that shape out and discard the surrounding paper.
Step #2: Iron the freezer paper onto the shirt
This is where you figure out why you’re using freezer paper specifically. Freezer paper has a poly coating on one side that makes it perfect for wrapping and protecting items in the freezer because the coating acts as a moisture/vapor barrier that helps preserve freshness.
That same poly coating provides a perfect temporary adhesive that you activate by heating it with an iron.
Whether you’re using method one or two, you will place the freezer paper coating-side-down onto the T-shirt, quilt or other piece of fabric, so that it is positioned where you would like the final design to appear. Place a warm iron on the positioned paper and gently slide the iron from the middle toward the edges of the paper.
It doesn’t take long for the coating to soften and adhere to the fabric. Don’t keep the iron on it too long, and try not to use too hot of an iron or you could do damage to the stencil or the material itself.
Step Three - Fill or surround the freezer paper stencil using fabric paint or bleach
Now that your freezer paper stencil is attached to the T-shirt, if you’re using method #1, you can use bleach or fabric paint to fill in the spots you cut out of the paper, creating a full-color design on the fabric. Remember, if using bleach, use caution when applying it to the fabric. Apply it in a safe environment, where your fabric is separated from other garments, furniture, or materials that could be damaged. Before using any bleach product, be sure to read these guidelines on bleach safety first.
Using method #2, you can apply the paint or bleach in a spray or spatter pattern across the fabric, allowing the stencil to protect a covered area the shape of the stencil.
In both cases, when you remove the stencil (which should peel off easily without leaving residue,) you’ll have a clear design that contrasts with the background color of the T-shirt. Allow the shirt to dry overnight, and impress your friends with it the next day!
This same idea can be used to make pretty much any kind of custom stenciled clothing, table coverings, even framed prints! For some more great ideas and for more detailed instructions on using freezer paper stencils, including pictures, check out this helpful Instructables page.
Image courtesy of http://www.instructables.com/


